Published: 4 February 2023
I am blind
I've been looking forward to writing this post. I really enjoy working with screen readers and using them to test documents and websites. I also get great satisfaction when demonstrating using a screen reader, as it is often the light switch moment, where somebody suddenly understands why accessibility work is so important.
The first section of this post will look at the main screen readers that are in everyday use. There are others, but these are the ones that most people use on a computer, so we'll stick to these for now.
The second section is about creating documents and other content so that screen reader users can access it fully. One of the most common misunderstandings I encounter at work, is the idea that providing the same content in a Word document will automatically make it accessible. No! It won't! To make a Word document accessible, you have to make it accessible. The same goes for Excel and PowerPoint, and even emails.
Screen readers
Screen readers are sometimes referred to as text-to-speech. They read out what is on the screen, so that a blind person can listen to it instead of reading. However, they also contain features to help with navigation and efficiency, which are worth understanding.
Keyboard navigation
Because screen reader users are often blind, and obviously a blind person cannot see the screen, using a mouse to navigate is difficult or impossible. Most screen reader users will use the keyboard for all navigation. I find it easier to use a keyboard for most things too, as I struggle with mouse control most of the time.
General keyboard navigation
I won't assume anything, so here are some keyboard commands for generally navigating your computer.
| What do you want to do? | What to press |
|---|---|
| Open an application | Win to open the start menu, then Tab and the arrow keys to move around. Enter opens a group or application. |
| Switch to a different application that is already open | Alt + Tab. Keep pressing the Tab key until you get to the application you want to work with, then release the Alt key. |
| Switch to a different tab in an internet browser | Ctrl + Tab |
| Close an application | Alt + F4 |
| Access my desktop | Win + D |
Microsoft 365 keyboard navigation
Most of the Microsoft applications work in a similar way. You have menus at the top, with a ribbon underneath and then the document or spreadsheet or slides under that.
To access the menus, press the Alt key. This will select the Home menu and will also label each menu with a letter. Pressing that letter will open the menu but you can also move between menus using the left and right arrow keys.
Once you get to the right menu, you can use the down arrow key to enter that ribbon. The ribbon is where all the different options are. You can then move around that ribbon, using the arrow keys. If you want to open a submenu, press Enter. You can then use the arrow keys to explore all the options available. When you find what you want to activate, press Enter again.
PowerPoint extras
The main difference with PowerPoint, is that you are working with objects on the slide and moving from object to object for editing purposes can be tricky.
When you first open a PowerPoint file, there will be a pane on the left that contains each slide and the first slide will be selected. You can use the up and down arrow keys to change slide. When you want to edit a slide, press Tab and that will take you to the first object on the slide. Press Enter to activate that object and edit it.
Once you have finished editing a particular object, you might want to edit something else on the same slide. To do this, press Esc and then you can use the Tabkey to move around other objects on the same slide.
When you have finished working on that slide and you want to change slide, press the Esc key. If you are in an object, you will need to press it twice, once to exit the object and again to exit the slide. Then you can use the up and down arrow keys to move to another slide.
Windows Narrator
All Windows 10 and 11 computers have a built-in free screen reader. It isn't as feature-rich as some of the other ones but it isn't bad either. I find that with PowerPoint, Narrator gives the best experience.
Useful Narrator commands for reading and navigating
In the following list of Narrator commands, the Narrator key will be either your Insert key or Caps Lock key. This can be changed in the Narrator settings.
| What do you want to do? | What to press |
|---|---|
| Read the whole thing from the top | Narrator + down arrow |
| Read the whole thing from where the cursor is | Narrator + R |
| Get a list of headings | Narrator + F6 |
| Get a list of links | Narrator + F7 |
| Pause Narrator speaking | Ctrl |
| Toggle Narrator on and off | Ctrl + Win + Enter |
Narrator is my screen reader of choice for accessing PowerPoint presentations. Once in presentation mode, you can use Narrator + R to read the whole slide. When it has finished reading the slide, it will read the controls out and the second one is usually next slide. If you know it's coming and get in there quick with a press Enter, you can move seemlessly to the next slide and off you go again.
The reason why I particularly like Narrator for PowerPoint presentations is that there is currently a bug in JAWS. This means that even when the reading order is correctly set, JAWS reads all the images and links on a slide first. I reported it to Freedom Scientific about a year ago but it still isn't fixed.
JAWS
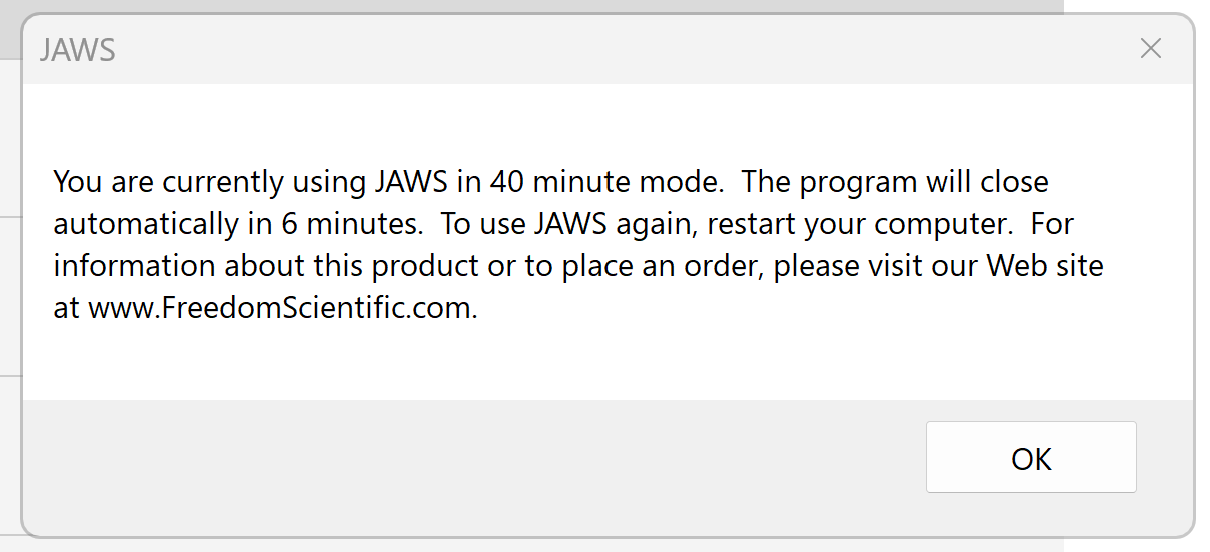
JAWS stands for Job Access With Speech. It is produced by Freedom Scientific and is the most commonly used screen reader in workplaces. Although the licences are quite expensive, you can download a trial version ![]() for free. The only difference is that you have to restart your computer each time you use it and every 40 minutes thereafter. For testing purposes though, it's great!
for free. The only difference is that you have to restart your computer each time you use it and every 40 minutes thereafter. For testing purposes though, it's great!
Useful JAWS commands for reading and navigating
In the following list of JAWS commands, the JAWS key will be either your Insert key or Caps Lock key. This can be changed in the JAWS settings.
| What do you want to do? | What to press |
|---|---|
| Read the whole thing | JAWS + down arrow |
| Get a list of headings | JAWS + F6 |
| Get a list of links | JAWS + F7 |
| Get a list of images | JAWS + Ctrl + G |
| Pause JAWS speaking | Ctrl |
| Close JAWS | JAWS + F4 |
What I love about JAWS is the amount of features to help navigate and access different types of content. The table above only begins to scratch the surface. At some point, I will produce some videos to show the fuller extent of JAWS.
NVDA
NVDA stands for Non Visual Desktop Access. It a free screen reader and anyone can download and install NVDA ![]() on their computer.
on their computer.
I'll be honest, I've never got on that well with NVDA. I first encountered it back in 2015, when I was studying Accessible Learning Content as a Master's module. I followed all the instructions but struggled to get it to read well. In the end, I gave up. This morning, I installed it on my laptop but after an hour or so of trying to get it to work, I gave up again. Given that Narrator is pretty good and easy to use, if I couldn't afford JAWS, I'd just use that.
VoiceOver
VoiceOver is the screen reader that is built into Apple devices. The big advantage of VoiceOver is that it is available on all Apple devices, not just MacBooks. So once you've learned how to use it, you can use the same technique on your iPad or phone.
I don't use VoiceOver that often. I probably should use it more at work but until yesterday, I had a very dodgy MacBook. Once my new one is all set up, I will make a concerted effort to learn how to use it properly.
Until then, it is probably best to point you in the direction of Apple's guidance for VoiceOver. ![]()
Tips for content creators
Document accessibility is a huge topic and a large chunk of it is related to screen reader use. If you want to learn more about this, you could also go to my pages on Word, Excel, PowerPoint and PDF guidance.
For the purposes of this post though, I've picked out four things that I think make the biggest difference to blind people, when they access your document content.
Visual information
Visual information is when you format text in a certain way to show people that it has a purpose other than normal text. For example, you might make headings bigger than the rest of the text, make them bold, and possibly centre them or make them a different colour.
You might put items on separate lines and either number or bullet them to show that they form a list.
You might set out data in rows and columns to show how the information relates to the headings at the top of the column or at the beginning of the row.
A blind person is at risk of missing this visual information, which is often critical to understanding it. The good news is, in all of the main office applications, you can create this information in ways that a screen reader can read and convey to a blind person.
Images
Images are, by their very nature, visual. For a blind person to be able to access an image, it needs to be described in text. We call this alternate text or alt text for short.
In Word, PowerPoint and Outlook, (and many other applications) you can add alt text by right-clicking the image and selecting Edit Alt Text. You can also get their via the Picture menu and there is an Alt Text button on the ribbon. Either way, this opens a pane to the right of the main screen. You can type in your image description and then close the pane.
When writing alt text, here are some general guidelines:
- Describe the image accurately but briefly, preferably in less than 150 characters
- Do not say image of, picture of, etc. as the screen reader will announce it as an image anyway
- Do not give additional information that is not available to sighted people
- Do not miss out any important information
- Avoid images of text, giving the actual text where possible instead.
Reading order
In Word and Outlook, the reading order is largely taken care of. A screen reader will read from top to bottom and left to right, assuming it is in English. The only thing that can mess this up, is if you start wrapping objects, such as images, so that they are no longer inline with the text. You should avoid doing this, as it causes problems for screen readers.
In PowerPoint, the reading order is often the order that the objects were inserted on the slide. This is rarely the order you want somebody to read it in. To ensure that a screen reader reads the slide in the correct order, you need to adjust the reading order. This is easiest to do by opening the reading order pane.
- Go to the Review menu.
- Find Accessibility on the ribbon.
- Open the dropdown menu.
- Select Reading order pane.
- Rearrange the objects in the pane, so that they are in the correct order.
If you are working in an older version of PowerPoint, you might have to use a different method. These are explained in more detail on my PowerPoint Reading Order page.
Link text
Links are a useful way of moving from one place to another. Again though, they are visual. You know there is a link because it is a different colour from the rest of the text and it is often underlined, especially if you hover the mouse over it. Fortunately, screen readers will announce links when reading the text, but they also have a fantastic feature that allows the user to bring up a list of all links in a document.
If you imagine viewing a list of links separate to the document (or webpage) itself, the wording of the link text becomes quite important. Links such as Read more or Click here, become meaningless out of context.
When creating links in Microsoft Office, bring up the Edit Link dialogue box and ensure that the Link Text makes sense, even if it is viewed out of context.
Summary
If a person is blind, they should still be able to use a computer with the help of a screen reader. They can create and read documents as long as they have been created correctly, following a few basic guidelines.
If you are a content creator, it is a good idea to have at least one screen reader for testing purposes. This can be the free, built-in screen reader on your computer - either Narrator or VoiceOver. You don't need to read the entire document but check bits that may not be straightforward. If it doesn't read well, find out why and fix any problems before sending it out.